

Your camp kitchen
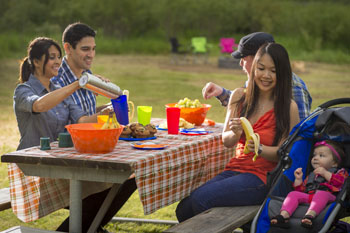
One of the best parts about camping is the food! There's something about fresh air and outdoor activity that make us hungry. After all, some of your best memories will be made while sharing a good meal with friends and family.
Planning
Before leaving home, plan out what you are going to eat at each meal, including snacks, while you are at the campsite. You must take into account the food allergies and intolerances of the people in your group as well as the cooking method.
If you are camping with other families, you could split the meal responsibilities; one family can prepare dinner while the other washes the dishes and then reverse the roles the next day.
As much as possible, try choosing meals that can be started at home and easily cooked or re-heated once at the campsite (on a camping stove or over a campfire). In this way, you’ll be able to spend more time enjoying the outdoors and all the activities available in the park. You can also include meals that do not require to be cooked such as sandwiches or salads. For your first meal after you arrive, we recommend having a simple meal ready to eat, so you can focus on setting up your campsite without the hassle of cooking as soon as you arrive.
Your menu may also be influenced by the weather forecast and ease of replenishing your food supplies. In fact, many campgrounds are near towns with grocery stores, shops, and restaurants. Find out before you leave what will be available to you, by checking online or by calling the site directly.
Depending on your comfort level, you may consider cooking some meals over the campfire. However, be aware that there may be a fire ban if conditions are dry in the area.
Lastly, don't hesitate to plan a meal made up of "leftovers", which can be enjoyed near the end of your trip. This is a great way to empty your containers, lighten your load and reduce waste.
Menu
Get your camping meal planning started with some great camping recipes. Involve the whole family in the choice of meals and consider trying some of our easy preparation meal ideas.
- Yogurt, granola and fruit
- Cereal
- Oatmeal and dry fruits
- Bagel / English muffin / bread
- Ham and cheese omelet
- Pancakes or crepes / French toast and syrup
- Fresh fruits
- Coffee, tea, milk
- Sandwiches and garden salad
- Pita, hummus, fresh veggies, cheese and crackers
- Soup and sandwich wraps
- Hard-boiled eggs with cheese and crackers
- Hot-dogs and potato salad
- Couscous and beans salad
- Hamburgers and corn on the cob
- Fajitas / tacos
- Spaghetti with meat sauce
- Tortellini with rosé sauce
- Tofu and veggie stir fry
- Chili and corn chips
- Sausages and roasted vegetables
- Pizza on pita or naan bread
- Beef and vegetable stew
- Fish in foil and rice
And a few ideas for snacks:
- Granola bars
- Homemade muffins (carrots, bananas, etc.)
- Fresh fruits (favour harder fruits)
- Dry fruits
- Apple sauce
- Nuts mix
- Crackers and cheese
- Dry meat such as jerky
- Rice crackers and nut butter
- Marshmallows, chocolate, Graham crackers for s’mores, of course!
Preparation, preparation, preparation!
The more you do in advance, the less you will have to do at your campsite! Doing some extra prep at home, in the comfort of your own kitchen, will make your trip all the more enjoyable.
Here are a few things to keep in mind:
- Cut and chop meat and vegetables, grate cheese, sort and label each item by meal.
- Cook some foods ahead of time like rice, pasta, bacon, ground meat and onion.
- Marinate and freeze meats, fish and seafood or even whole meals such as chili, soup, homemade pasta sauce; these can also be used as ice packs.
- Cook snacks that can be kept at room temperature such as muffins or granola bars.
- Make a homemade pancake or crepe mix and pour it into a bottle.
- Break eggs and pour them into a glass jar with an airtight lid.
- Bring only what you need to save space. Carry food and liquids in small, lightweight and reusable containers appropriate to the amount you will need during your trip like condiments, salt, pepper, spices, oil, salad dressing, maple syrup, nut butter, cereal.
- Provide a few empty reusable containers to store the leftovers and keep them for a later meal. If possible, choose plastic containers that are lighter and less likely to break.
Staff tips:
Practice cooking outside before you go camping! This will allow you to test your stove, understand what food preparations might be most useful, and gauge what cooking tools you’ll need.
How-to pack a cooler
Transcript
[A couple carries a large cooler to a campsite in a forest. In front of them, a tent and a picnic table stand on a carpet of orange leaves. The Parks Canada logo, a white circle around a beaver on sitting a log, appears.]
Narrator: "One of the joys of camping is eating a delicious meal in the great outdoors. Here’s a few tips for packing your cooler to ensure your food stays cold and fresh on your next trip."
[Text on screen: LEARN-TO CAMP, HOW TO PACK A COOLER]
[The cooler stands open on top of a checkered tablecloth on the picnic table. The woman takes a plastic container filled with sliced fruit out of the cooler and puts it on the table.]
[Text on screen: GOOD QUALITY RIGID COOLER]
Narrator: "Start with a good quality, thick sided, rigid cooler."
[The large rigid cooler and a fabric cooler sit side by side on a kitchen floor. The rigid cooler lights up.]
[Text on screen: PREPARE YOUR COOLER]
Narrator: "Before packing it, ensure it is clean and cooled. You can do so by letting it air out in a cool location overnight or by filling it with cold water for 30 minutes."
[The man puts the cooler in a bathtub and fills it with cold water.]
[Text on screen: FOOD PREP]
Narrator: "Preparing your food at home will simplify your camping experience and save space in your cooler."
[The man cuts bell peppers into slices and puts them into a plastic container.]
Narrator: "Another great tip for saving space is to pour condiments into smaller bottles."
[The woman pours a large bag of ketchup into a small plastic bottle."
Narrator: "Whatever is stored in the cooler will get wet, so make sure everything is transferred into reusable, leak-proof containers."
[The woman packs a dozen eggs into a plastic container, while the man closes a salad container with an airtight lid.]
Narrator: "Any foods that you don’t plan on eating right away can be frozen and used as additional ice blocks."
[The woman takes two containers out of the freezer.]
[Text on screen: PACK YOUR COOLER, STEP 1, ADD BLOCK ICE]
Narrator: "Now that you are ready to pack your cooler, begin by placing large block ice at the bottom."
[Three blocks of ice pack and two ice packs appear at the bottom of the cooler. The woman puts containers of food into the cooler.]
[Text on screen: STEP 2, ADD PERISHABLES]
Narrator: "Cold air sinks so things you want to keep cooler for longer need to be added first. Perishables like meat and dairy should be placed as close to the ice blocks as possible."
[Various containers of food appear directly on the ice blocks in the cooler: sausages, ground beef, cheese, milk, and mayonnaise.]
[Text on screen: STEP 3, FILL EMPTY SPOTS]
Narrator: "Air is the enemy of your cooler, so try to fill empty spots with smaller items."
[Yogurt drinks and small ice packs appear in the spaces between the larger containers.]
[Text on screen: STEP 4, ADD FREQUENTLY NEEDED ITEMS]
Narrator: "Next, you’ll want to add anything you will be accessing frequently."
[Text on screen: STEP 5, ADD FRAGILE FOOD ON TOP]
Narrator: "Leave fragile foods like fruits and veggies near the top of the cooler."
[Bananas, a carton of blueberries, a carton of strawberries, a plastic egg carton and a tray holding peppers and foil-wrapped potatoes appear on top of the other containers. The woman closes the cooler.]
Narrator: "At your campsite, try to keep the cooler in the shade and away from direct sunlight. Keep your cooler closed and only open it when needed."
[The man and the woman carry the cooler to their campsite and set it on the picnic table.]
Narrator: "Place drinks in a separate cooler, since you will probably access these more frequently. Try not to drain the melt water in your cooler. It helps to keep food cold!"
[The man opens a smaller rigid cooler, takes out a bottle of orange juice and places it on the table. The woman takes a container of sliced fruit out of the large cooler and removes the lid.]
Narrator: "Now that you know how to pack your cooler, go camping and enjoy a nice meal outdoors."
[Text on screen: TO LEARN MORE ABOUT THE PARKS CANADA LEARN-TO CAMP PROGRAM, VISIT: PARKSCANADA.CA/LEARNTOCAMP]
[An autumn forest extends beside a peaceful lake.]
Narrator: "A message from the Government of Canada."
[The Canada Wordmark.]
If your cooler items include cardboard packaging or individual fruits and vegetables, make sure to protect them by sealing them in reusable plastic bags. This will prevent them from getting soggy when your ice begins to melt. Be aware that block ice melts slower than crushed ice and remember to refill with fresh ice after a while.
We also suggest that you keep all your non-perishable foods together in a large plastic bin. By putting all the food in one place, it will be easier to transport and store after each meal. If you have access to a second cooler, bring it along and use it exclusively for your drinks. This will allow you to open the food cooler less frequently and keep it cold for a greater length of time.
Download our equipment list to make sure you have all the necessary supplies for your meals once at camp.
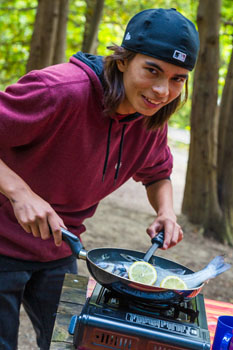
Cooking
Roasting hot dogs or marshmallows over a dancing flame, that first cup of camp coffee in the morning, or biting into sizzling kebabs straight from the grill – these could become some of your best camping memories.
Whenever possible, try to involve the whole family in meal preparation; younger children can set up the tablecloth and utensils, while older children can serve the plates and pour the drinks.
It’s always important to cook safely. Use your camping stove outside. Open flame is dangerous in a tent and harmful gases can build up.
To maximize the fuel efficiency of your stove, put a lid on your pot when boiling water for pasta or reheating a meal. This will also help reduce dirt or insects that could settle in your pot.
Some campsites have fire rings or pits with a grill that are perfect for camp cooking. Many campgrounds have wood available for fires. Remember to turn off your stove or fully douse your fire before going to bed or leaving your campsite.
How-to set up a tarp
Transcript
[A river flows past a campsite on the edge of a forest in autumn. Three people sit around a picnic table under a tarp suspended by ropes. The Parks Canada logo, a white circle around a beaver on sitting a log, appears.]
Narrator: "When camping, knowing how to set up a tarp is very useful. It can act as your main shelter from the sun, wind and rain."
[Text on screen: LEARN-TO CAMP, HOW TO SET UP A TARP]
Narrator: "Here's what you'll need: a tarp with grommets on all corners, a minimum of 25 metres of paracord, a minimum of 25 metres of rope (or guyline), 4 metal hook tent pegs. Bungee cords are also an excellent alternative."
[Each item appears on a picnic table: an orange waterproof tarp, a roll of white rope, four small rolls of blue cord, and four metal pegs with hooked ends.]
[Text on screen: SET UP YOUR TARP, STEP 1, EXPLORE THE CAMPSITE]
Narrator: "First, explore your campsite and identify two mature trees with sufficiently coarse bark approximately 3 to 5 metres apart, ideally located near your tent or picnic table."
[Two broad trees stand either side of the picnic table at the campsite. A rope tied between the trees holds the orange tarp above the table. A green line extends between the trees with text on top that reads, 3 to 5 metres.]
[Text on screen: STEP 2, ATTACH THE ROOF LINE]
Narrator: "Next, create a roofline. Unroll your paracord and wrap one end around one of the trees as high up as you can reach. Wrap the paracord a minimum of three times around the tree trunk."
[Two campers tie the end of a roll of paracord around one of the tree trunks just above head height. They wind the paracord around the trunk several times and test its strength by pulling it.]
Narrator: "Ensure the rope is nice and tight, then wrap it three times around the second tree. No need to tie a knot, the tension alone will keep the cord securely in place and easy to remove when it’s time to pack up."
[One camper holds the rope taut while the other wraps the end around the second tree trunk several times.]
[Text on screen: STEP 3, HANG THE TARP]
Narrator: "Next, toss your tarp over the newly created roofline so that it hangs equally on both sides."
[The three campers toss the tarp over the rope and adjust it by pulling one side down.]
[Text on screen: STEP 4, TIE THE ROPE]
Narrator: "Lastly, tie the end of each rope or guyline to the grommets on the corners of the tarp. The other end of these should be tied to something close to the ground. These can be other tree trunks or tree roots. Metal camping pegs nestled securely in the ground are a good alternative."
[The campers tie a guyline to each corner of the tarp with a knot and then stretch out the tarp. One camper wraps a guyline around a nearby tree trunk, while another hammers a metal peg attached to a guyline into the ground with a mallet.]
Narrator: "Ensure that the rope remains securely tied to the tarp and to the anchors for all four corners. If you notice the rope is loosening or has lost some tension, be sure to untie and retighten the rope to ensure it stays secure."
[The camper checks the tension of the cord attached to the metal peg by pulling it gently.]
Narrator: "Now enjoy your shelter!"
[The three campers share a meal at the picnic table under the tarp.]
[Text on screen: TO LEARN MORE ABOUT THE PARKS CANADA LEARN-TO CAMP PROGRAM, VISIT: PARKSCANADA.CA/LEARNTOCAMP]
Narrator: "A message from the Government of Canada."
[The Canada Wordmark.]
Set up your tarp so you can cook out of the rain. Some campgrounds have covered kitchen shelters for cooking and eating. You can also install a tarp over your picnic table to protect you from the sun, wind or rain. It’s easy to do! Watch our video to learn how.
Storing food
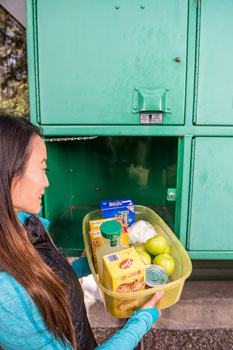
Most people go camping for a few days. It’s usually easy to safely keep food for that length of time if you have a cooler and a bin. If you are front country camping, store your food inside your vehicle or hard-sided trailer. Coolers, boxes, cans, tents, oTENTiks and soft-sided campers are not animal resistant!
Raccoons, squirrels, chipmunks, and other animals are attracted to odours from food, grease, garbage, cooking stoves, and even empty pet food bowls. Soaps and candles can be attractive to animals, as well as garbage that smells of food, such as wrappers and used paper towels. Learn more about wildlife in Parks Canada places.
Many campgrounds have a “Bare campsite” program in place. Download the brochure to learn more.
Dishwashing and waste management
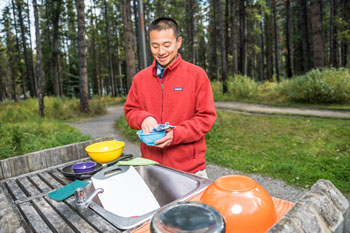
Dispose of food scraps properly, or you may attract unwanted animal visitors. Start boiling water in a pot just before sitting down to enjoy your meal. This way, it’ll be hot and ready to clean the dishes after you've finished eating. It’s a great trick to save time and quickly move on to other activities. Don’t forget to bring a plastic tub to rinse your dishes after washing.
Whenever possible, use biodegradable dish soap and always dispose of your dirty water down a drain or a sink at a washroom facility. Several campgrounds allow for recycling some of the waste and also offer containers for composting.
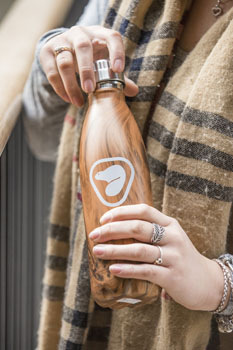
Staying hydrated
Drinking lots of water is very important while you are active outdoors. Especially on hot, sunny days, you will want to drink plenty of water in order to avoid dehydration. Make sure that you only drink potable water from reliable sources, such as the potable water taps found in the campgrounds. Although water in streams, rivers and lakes is generally clean and may look good enough to drink, it may contain harmful bacteria or parasites. Drink only potable water from faucets in the campgrounds. If you are unsure, don't hesitate to ask park staff for advice.
Back home
If you've planned your meals well, you shouldn't have a full cooler at the end of your trip. Regardless, it should still be one of the first things to empty when you get home. Make sure to clean your equipment before storing it until the next camping trip.
- Date modified :